Ghost is a blogging platform that you can host in your own web server or allow the company to host it for yourself to save time and stress (and to just focus on writing posts). Think about it as a WordPress site that has been tear down to the basic functionality like write posts, tag them and no more like that.
"Ghost is a platform dedicated to one thing: Publishing." Ghost's About page
But if you are reading this it means that you already know Ghost, you already have a blog hosted by them under an URL like yourname.ghost.io, and you already know it can cause you a big headache to configure your custom domain to point to your blog using both the www and non-www version of your domain, and not just only one as Ghost seems to allow.
I fought with this problem when I created this blog, so probably what I experienced can help somebody now.
CloudFlare DNS and Page Rules configuration
Let's assume you have the yourdomain.com domain and you want to point it to yourname.ghost.io.
Also, let's go a even forward and assume you already add your custom domain to CloudFlare, on its non-www version, because the main problem here is to make both www and non-www work, as Ghost already explains how to get only one of them working.
DNS settings
Access your domain DNS setting within CloudFlare in order to create a new CNAME record that points your domain without www to your Ghost's blog URL.
- Type: CNAME
- Name: yourdomain.com
- Target: yourname.ghost.io
Then, add a new CNAME record, this time for pointing the www subdomain to the domain without it, as follows:
- Type: CNAME
- Name: www
- Target: yourname.ghost.io
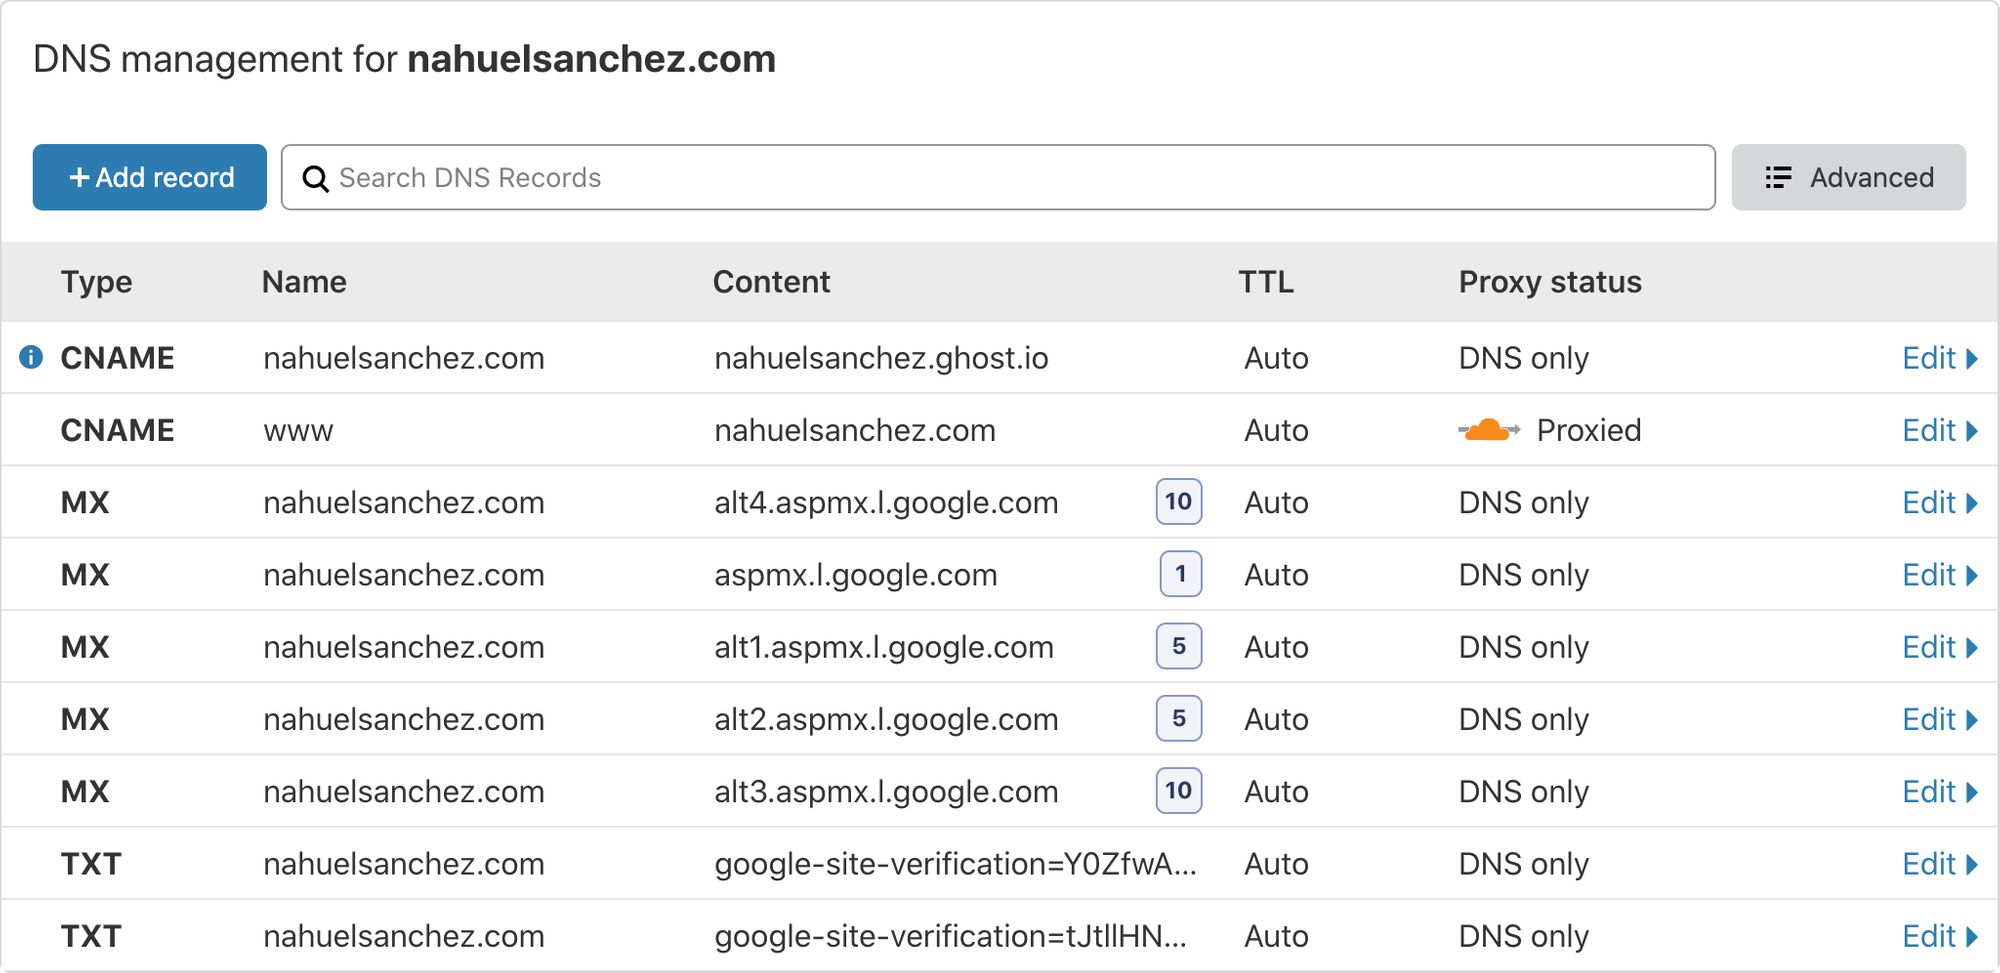
As reference, you can take a look at my configuration in the image below.

The first two rows are the one that matter for this tutorial, and the others are used to make Google G Suite works (so I can have my email hosted by Google).
It is necessary that the configured both CNAME to go through the CloudFlare servers, which means that the cloud icon at the last column should be orange, in order to make use of all the other features from the service.
Page Rules setting
Lucky us, CloudFlare provides a way to configure page rules in order to redirect somebody who types some URL to another configured URL.
In this case we want to redirect the www version of our domain (www.yourdomain.com) to the non-www version of it (yourdomain.com).
Note that my decision was to have the non-www version of my domain as the default one because I just like it that way. If you prefer the other way around, then invert the CNAME configuration on the previous step and configure the following page rules inverted too.
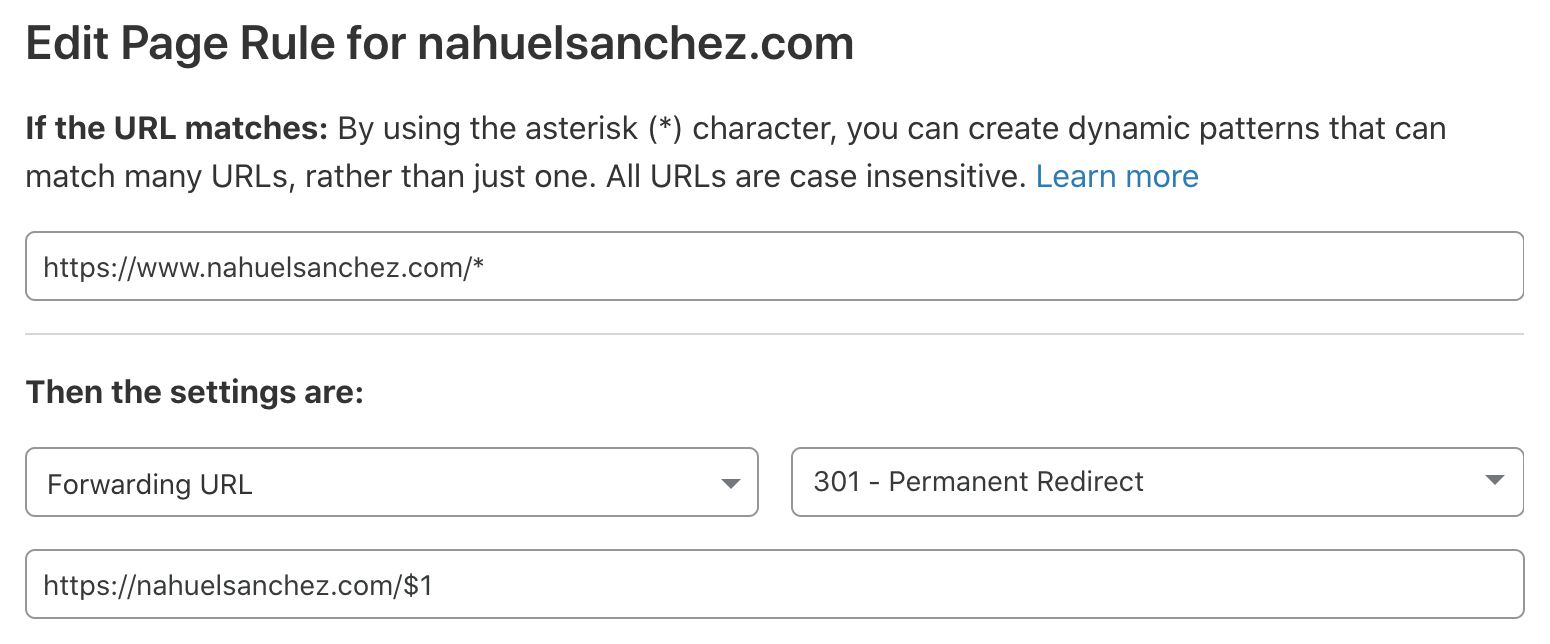
That being said, add a new rule for an URL matching "http://www.yourdomain.com/*", pick the "Forwarding URL" setting, configure its status code as "301 - Permanent Redirect", and enter "http://yourdomain.com/$1" as the destination.
Look at my page rule for this blog to get things even more clear.

Probably you're wondering about the * and $1 on the URLs. They are there to match whatever comes after the domain with www in order to add the same to the non-www domain version once the redirection takes place.
For example, with this page rule as described, when somebody types www.yourdomain.com/this-is-a-blog-post/ it's going to be translated to yourdomain.com/this-is-a-blog-post/.
No visitor is left behind with this configuration.
Ghost Custom Domain configuration
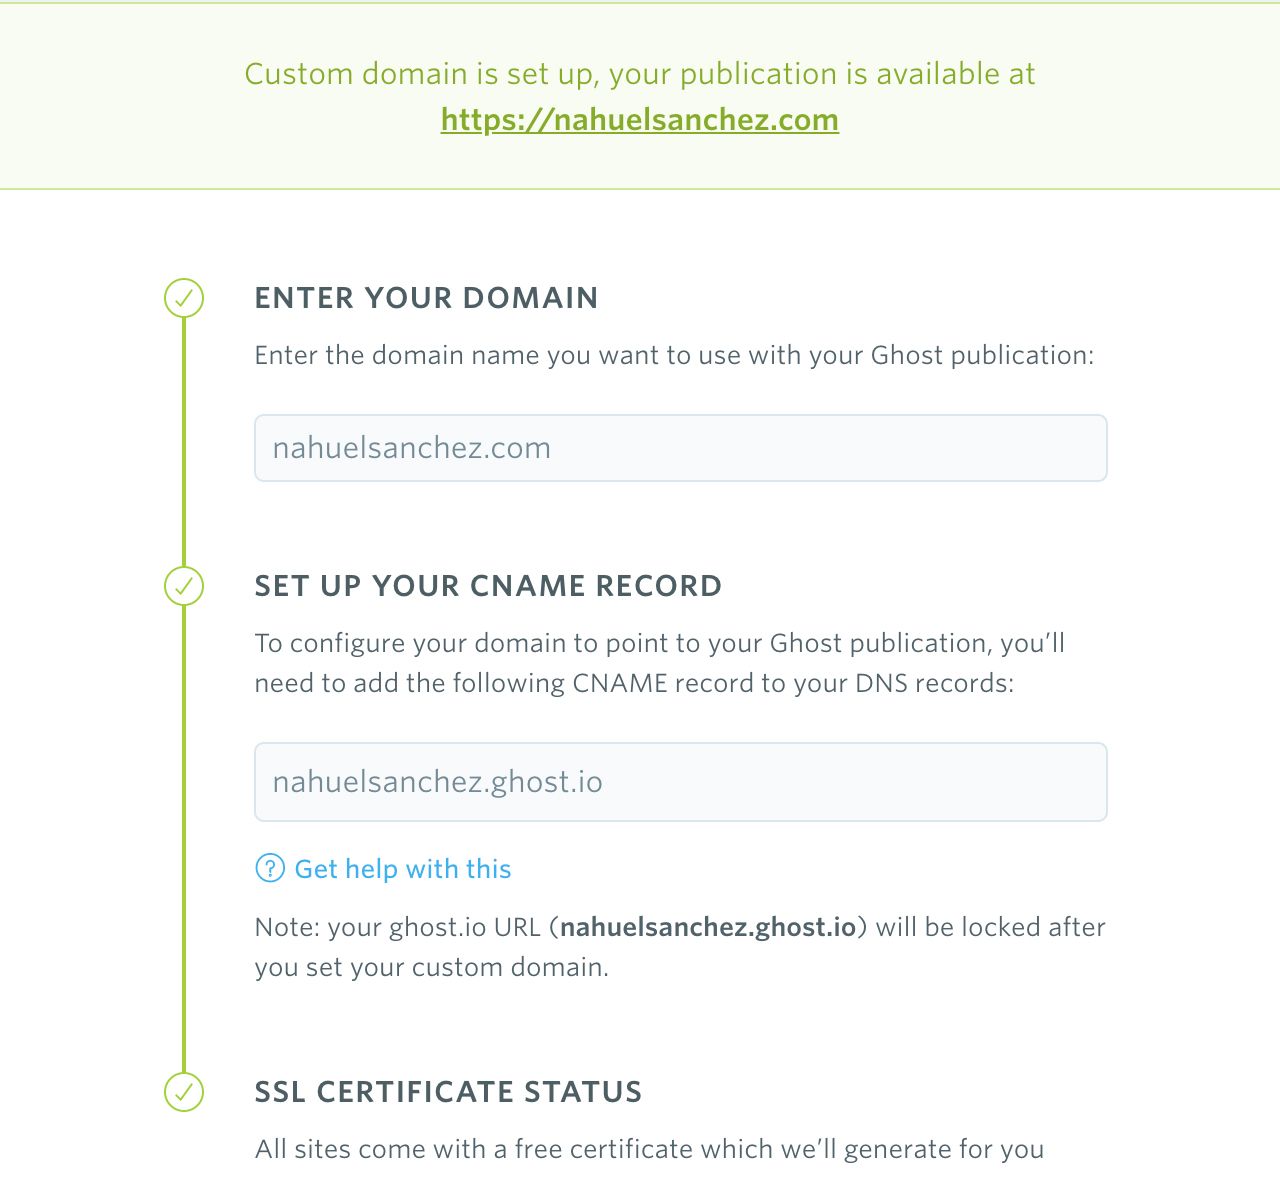
Finally, this whole CloudFlare setup will make sense if you go back to your Ghost blog configuration in order to set the non-www version of your domain as the Custom Domain of your blog.

That's all it takes to have both yourdomain.com and www.yourdomain.com working with your Ghost blog.
If you can't see the results, meaning the redirection is not working for you, first take a break because it could take some minutes to take effect, or blame the cache of your browser (clean your browser cache and try again, or simple change the browser you are using).


